This is a cheesy yummy Vegetarian Layered Nacho Bake recipe that you will need a fork for! Layers of nacho chips, veggie ground round, refried beans, salsa and lots of cheese!
Continue reading “Vegetarian Layered Nacho Bake”
This is a cheesy yummy Vegetarian Layered Nacho Bake recipe that you will need a fork for! Layers of nacho chips, veggie ground round, refried beans, salsa and lots of cheese!
Continue reading “Vegetarian Layered Nacho Bake”
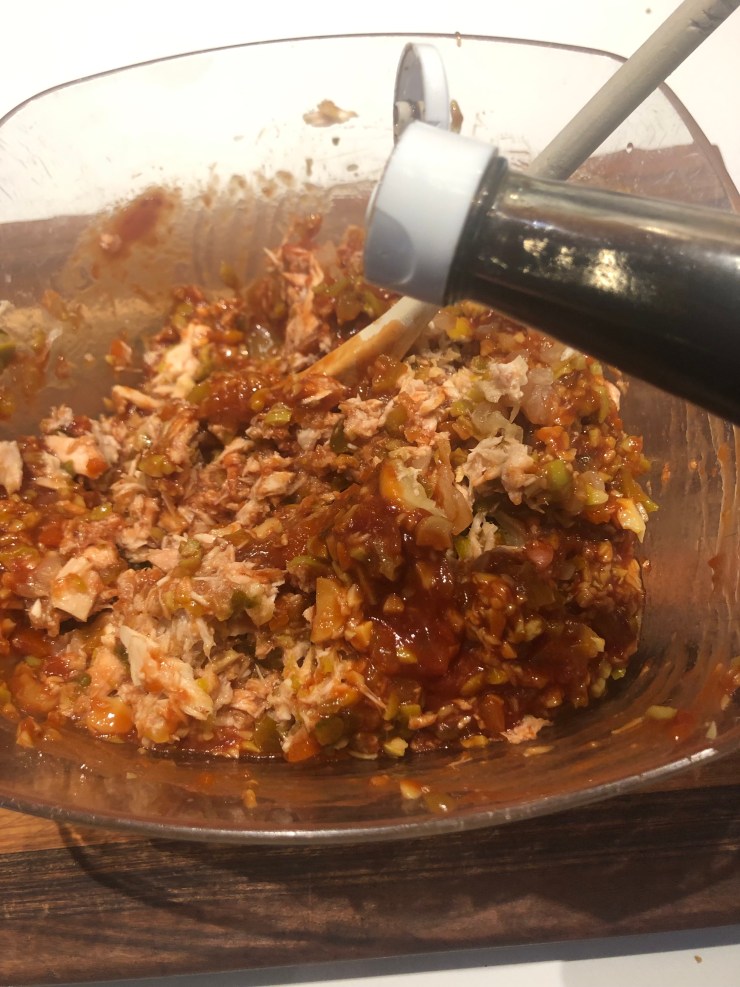
This is my Aunt Marilyn Lyman’s recipe. I remember her making this & she gave me the recipe aver 30 years ago….
The recipe is just a bunch of jarred pickles, olives, tuna….& a few other ingredients…chopped up, mixed together & wow is it good!My aunt used to chop all fo the ingredients by hand but I don’t do that… I use my food processor. The trick is not to over-chop them…still tastes ok…. i do like my antipasto to be less coarse than the bought ones so I’m ok anyway the ingredients come out of the food processor bowl. You can of course chop the ingredients by hand!
There is a recipe for Antipasto in Norene Gilletz cookbook, Pleasures of Your Processor that is very similar to this recipe. In that book, it says this keeps for 6 weeks….I have also been told it lasts only 3 days…so honestly I do not really know, but have kept it for a couple weeks. If you do not want to keep it for so long, make half the recipe!
Here is the full recipe.which makes 2 large jars….
Ingredients
2 cups sweet pickles, drained
1 can of sliced mushrooms, drained
1 1/2 cups pickled sweet onions
1 1/2 cups of pitted green olives…I use the pimento stuffed ones….
2 cans of tuna, drained & flaked
1 1/4 cups Heinz chili sauce
1 1/3 cups ketchup
dash of lemon juice
a few shakes of worsteshire sauce
Method
Serve with crackers….
Enjoy!!


This recipe was from my aunt, Marilyn Lyman. I was going through her recipes one day & came across this typewritten recipe for Cheezies… they are a homemade cheese kind of cracker ….The image I get when I think of these is having them at a cocktail party, with the men & woman dressed to the nines.. chatting , drinking martinis & having these lovely little cheese crackers ….
The recipe is a bit vague… I tried them 2 different ways. One as it was written on the card.. mixed by hand…they were a bit crumbly& chunky…..so I tried them again using the food processor & they came out more to my liking..the texture was smooth & the cracker was not crumbly’
Continue reading “Cheezies….An Appetizer”
This is perfect for game day…or any day actually!!!!
This is a cheesy yummy nacho bake that you will need a fork for! Layers of nacho chips, refried beans, salsa and lots of cheese!
Continue reading “Layered Nacho Bake-Vegetarian”

I love guacamole & I love hummus…so I combined them. Easy. Also good because I had 1 can of chickpeas & a couple of avocado that were getting nice & ripe so I needed to use them.
Continue reading “Avocado Hummus”
I think this is a good day to revisit my post with a recipe for the Layered Nacho Bake. You can make this as a vegetarian dish using ground round or only vegetables & cheese…or use some ground beef… all options are delicious! Perfect to nosh on while watching the Oilers play..or your fav team! Or good for a Cinco de Mayo party! Any reason, any time, any way…. this is cheesy & delicious.

Please leave a comment & let me know what you think. You can follow me on Facebook or Instagram…marilyndishes

UPDATED FEB/23
I have been making gefilte fish from scratch for years, but only make it twice a year. Rarely do I buy the pre-made frozen logs, though I like to have one on hand in the freezer “just In case”.
Continue reading “Gefilte Fish in the Instant Pot”
As with Hummus, there are so many recipes for Baba Ganoush & I pretty much like all of them. Some are made with mayonnaise which I really like but the one that I have been making lately uses tahini. Very quick & simple, delicious & healthy. If you can not eat tahini, add mayonnaise in its place. If I am using mayo I add enough to get the colour I like. I know that is not very exact, but somehow it works. I like the baba ganoush to be a medium grey colour if that helps!!
Here is the recipe
Baba Ganoush with Tahini
! medium size eggplant
1 lemon, squeezed *** discard lemon
1 clove of garlic, minced *** tip if using a food processor, you can drop a peeled clove of garlic into the food processor while it is running & it will get minced!!
1 -2 tsp salt
4 tbsp olive oil
3 tbsp tahini *** if you want to make this for Passover, use mayo!
Method
Enjoy!


Fresh green beans, cooked tender crisp & eaten cold with soft pickled onions. This is a great side dish or salad…your choice. I served this as a side dish, but I think it would be good served as part of an appetizer course for dinner. I follow a great food blog called loveandumami. The recipe for pickled onions is from there. I made them mostly because we like onions, but not raw ones. This seemed like a perfect solution. I am not going to put the recipe here, but I think you should visit loveandumami & get the recipe! I served these onions with cold blanched green beans that I had put a vinaigrette on . I will give you the recipe for the green bean salad
You can find the recipe for the pickled onions here
https://loveandumami.com/2017/03/16/quick-pickled-onions/
Green Bean Salad with Pickled Red Onions
3oo grams of fresh green beans *** of course you can make as much as you’d like!
Pickled red onions ***get the recipe from lovenadumami
Vinaigrette:
3 tbsp olive oil
1 1/2 tbsp white wine vinegar
1/2 tsp Dijon mustard
1/2 tsp sugar
1.2 tsp salt
pepper
Method
Enjoy!


There are so many recipes for Hummus & so many options to buy it ready-made in the grocery stores. But..I like making it myself. It is fast, easy & I can have it on a whim. I started making my own over 25 years ago and have come up with a recipe that we love. Lemony & smooth.If you don’t like yours lemony, just add the lemon juice gradually and taste as you go! Eat it with pita, fresh or baked, crackers, vegetables, on toast or just with a spoon! I toasted some pita in the oven which I had frozen when we had too much one time and it is great!
Here is my recipe for Hummus
Hummus
Ingredients
1 can chickpeas, drained & rinsed *** some people peel them to get a smoother hummus but I never want to spend the time doing that!
1 tsp garlic paste ***or 1 clove of garlic minced
3 Tbsp fresh lemon juice *** juice from a whole smallish lemon
1 tsp Kosher salt ***regular table salt is fine
4 Tbsp olive oil
3 heaping tbsp Tahini paste
2 Tbsp water
Method
Baked Pita Chips
Preheat oven to 400F ***I just turned my oven on while I was preparing the pitas, so it wasn’t quite at 400 degrees yet
Line 2 baking sheets with parchment paper
Ingredients
I pkg of large pita pockets
olive oil
kosher salt
dried parsley
Method
Hummus


Run don’t walk to the grocery store so you have time to put this together for the game..or anytime actually! This is a cheesy yummy nacho bake that you will need a fork for! Layers of nacho chips, refried beans, salsa and lots of cheese..nothing bad here!
Continue reading “Layered Nacho Bake- Vegetarian”


You must be logged in to post a comment.